Getting Started with Repoply
Repoply is a powerful subscription management system for Shopify stores. Follow this comprehensive guide to get up and running quickly.
Step 1: Install from Shopify App Store
Visit the Shopify App Store
Go to the Shopify App Store and search for "Repoply" or visit our direct app listing.
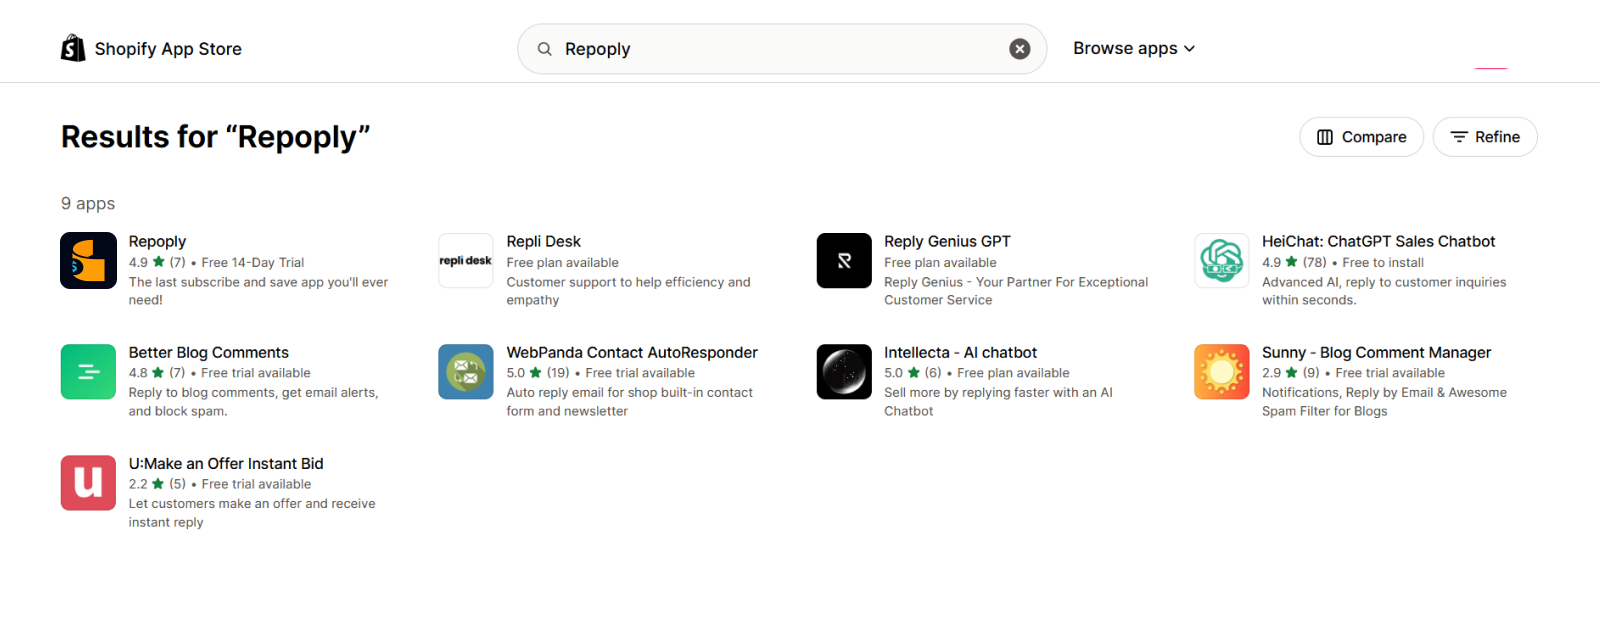
Click "Add app"
Click the app and click on the black 'Install' button to begin the installation process.
Review App Permissions
Repoply requires the following permissions to function properly:
- Read and modify products and inventory
- Read and modify customer data
- Read and modify orders
- Access to subscription contracts
- Read store information
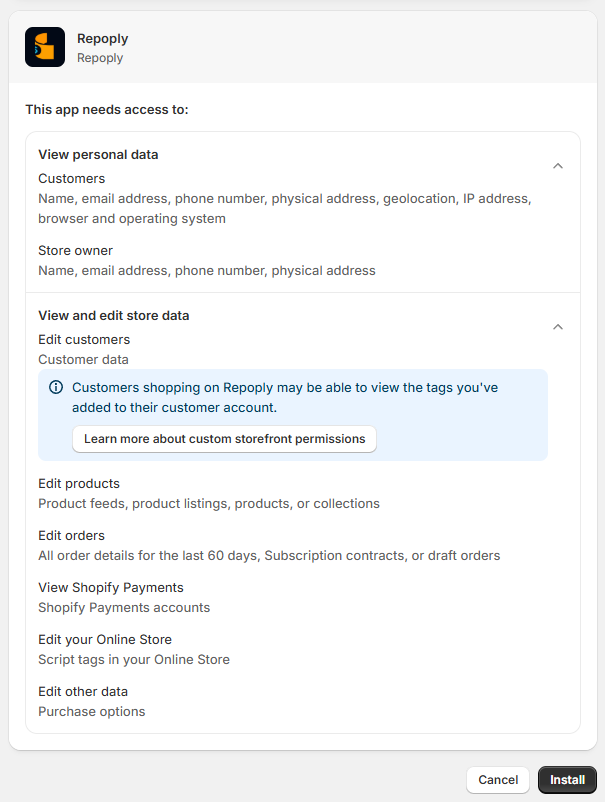
Accept Permissions & Install
Click "Install app" to accept the permissions and complete the installation. You'll be redirected to the Repoply dashboard.
Setting Up App Blocks
Repoply provides two essential app blocks that need to be added to your theme for full functionality.
Product Page Subscription Widget
Adding the Subscription Widget to Product Pages
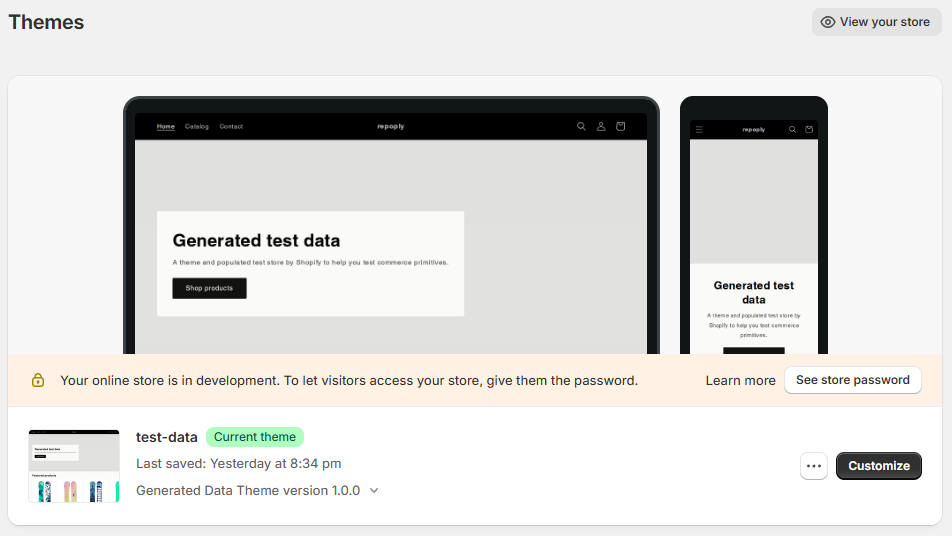
Access Theme Customizer
In your Shopify admin, go to Online Store > Themes and click "Customize" on your active theme.
Navigate to Product Page Template
In the theme customizer, navigate to Products > Default product to access the product page template.
Add Repoply Subscription Block
Click "Add block" in the product form section and select "Repoply - Subscription Options" from the Apps section.
Position the Block
Drag the block to position it where you want the subscription options to appear (typically after the price and before the add to cart button).
Save Changes
Click "Save" to apply the changes to your theme.
Account Dashboard Subscription Manager
Adding the Subscription Manager to Customer Accounts
Navigate to Account Page Template
In the theme customizer, go to Customers > Account to access the customer account page template.
Add Account Subscriptions Block
Click "Add section" and select "Repoply - Account Subscriptions" from the Apps section.

Configure Block Position
Position the block where you want it to appear on the account page (typically in the main content area).
Save Changes
Click "Save" to apply the changes to your theme.
Customizing Your App Blocks
Both Repoply app blocks come with extensive customization options to match your store's design.
Subscription Widget Customization
Available Customization Options
- Color Scheme: Choose between Light and Dark themes
- Widget Title: Customize the heading text
- Button Styling: Adjust button colors and text
- Layout Options: Select between compact and expanded layouts
- Typography: Match your store's font settings
Account Subscriptions Manager Customization
Theme and Layout Options
- Color Themes: Light, Dark, or Auto (follows system preference)
Managing Subscriptions
Learn how to create, edit, and manage subscription plans for your products.
Creating a New Subscription Plan
Access Subscription Dashboard
From your Shopify admin, click on "Apps" and select "Repoply" to access the subscription dashboard.
Navigate to Subscriptions
Click on "Subscriptions" in the left sidebar to view all subscription plans.
Create New Subscription
Click "Create subscription" to start building a new subscription plan.
Configure Plan Details
Fill in the subscription plan details:
- Plan Name: Internal name for your subscription
- Description: Customer-facing description
- Billing Frequencies: Weekly, Monthly, Quarterly, etc.
- Discounts: Percentage or fixed amount discounts
- Product Selection: Choose which products to include
Set Discount Options
Configure discounts for each billing frequency:
Select Products and Variants
Choose which products and variants this subscription plan applies to. You can select entire products or specific variants.
Save and Activate
Review your settings and click "Save" to create the subscription plan. It will be immediately available on your selected products.
Editing Existing Subscriptions
Modifying Subscription Plans
Access Subscription List
In the Repoply dashboard, go to "Subscriptions" to see all your existing plans.
Select Plan to Edit
Click on the subscription plan you want to modify to open the edit interface.
Make Changes
Update any of the plan details, frequencies, discounts, or product assignments.
Save Changes
Click "Save" to apply your changes to the subscription plan.
Setting Fixed Discounts
Configuring Subscription Discounts
Repoply supports both percentage and fixed amount discounts for subscription plans:
- Percentage Discounts: E.g., 15% off regular price
- Fixed Amount Discounts: E.g., $5 off regular price
- Tiered Discounts: Different discounts for different frequencies
Reports & Analytics 🚀 Enterprise Only
Advanced reporting features are available exclusively on the Enterprise plan.
Accessing Reports
Navigate to Analytics
In the Repoply dashboard, click on "Analytics" in the left sidebar to access reporting features.
Select Report Type
Choose from available report types:
- Subscription Growth: Track subscription acquisition over time
- Revenue Reports: Analyze subscription revenue trends
- Customer Analytics: Understand customer behavior patterns
- Product Performance: See which products perform best with subscriptions
Export Data
Click "Export" to download reports in CSV format for further analysis.
Uninstalling Repoply
If you need to uninstall Repoply, you can do so through two methods.
Method 1: From Repoply Settings
Access Settings
In the Repoply dashboard, click on "Settings" in the left sidebar.
Find Uninstall Option
Scroll down to the "Danger Zone" section and click "Uninstall Repoply".
Confirm Uninstallation
Type "UNINSTALL" to confirm and complete the uninstallation process.
Method 2: From Shopify App Manager
Access Apps Section
In your Shopify admin, go to "Apps" and click "App and sales channel settings".
Find Repoply
Locate Repoply in your installed apps list and click on it.
Uninstall
Click "Uninstall" and confirm the action to remove Repoply from your store.
Still can't find what you're looking for?
Our support team is here to help you get the most out of Repoply. Whether you need help with setup, configuration, or have questions about advanced features, we're just an email away.
info@repoply.com